Follow the steps below to create and customize a drawer.
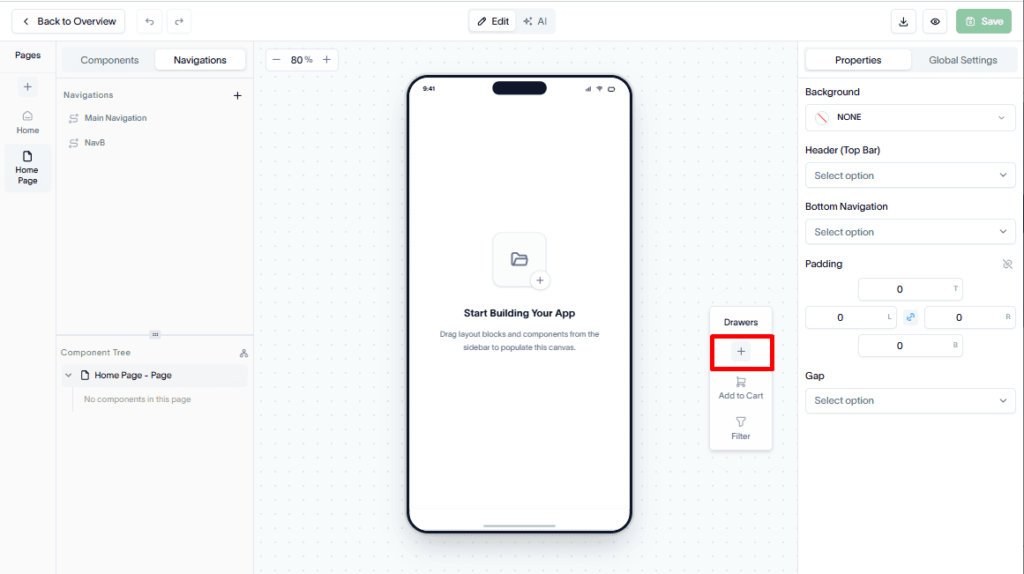
Step 1: Create a new drawer
Open the Drawers section and click the + (Plus) icon in the floating drawer list to create a new drawer.
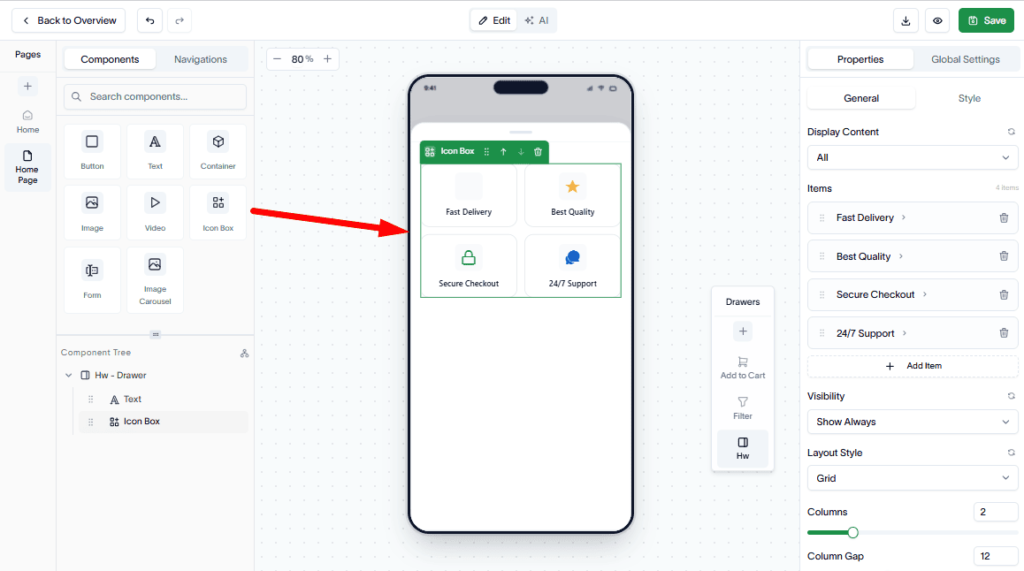
Step 2: Add components to the drawer
Once the drawer is created, use the drag-and-drop editor to add components to the drawer.
- Select components from the component library.
- Drag and drop them into the drawer layout.
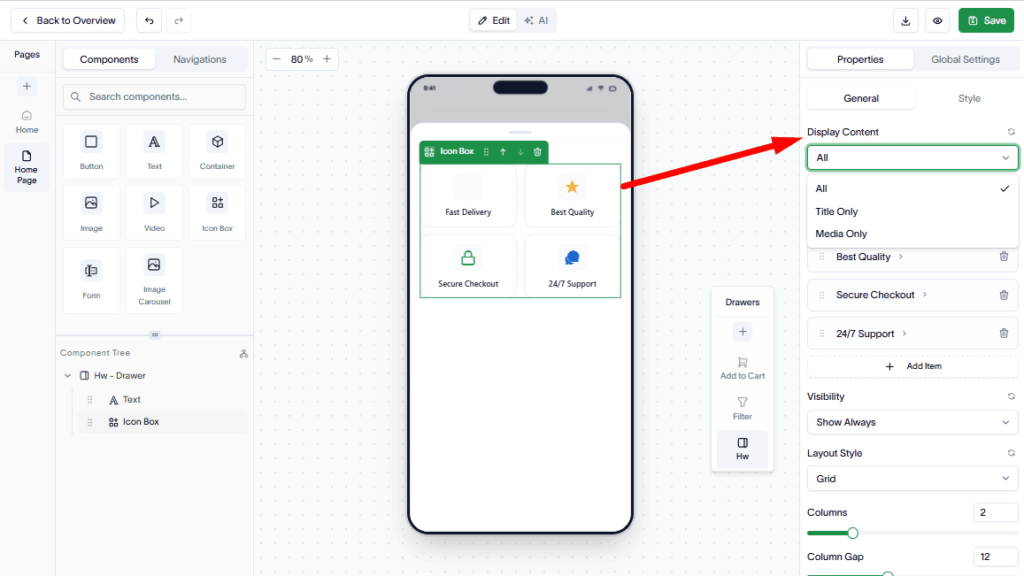
Step 3: Customize component styles
From the right-side component properties panel, the user can customize the component style exactly as he wants.
Step 4: Customize drawer design
You can also customize the drawer itself using the properties in the right sidebar.
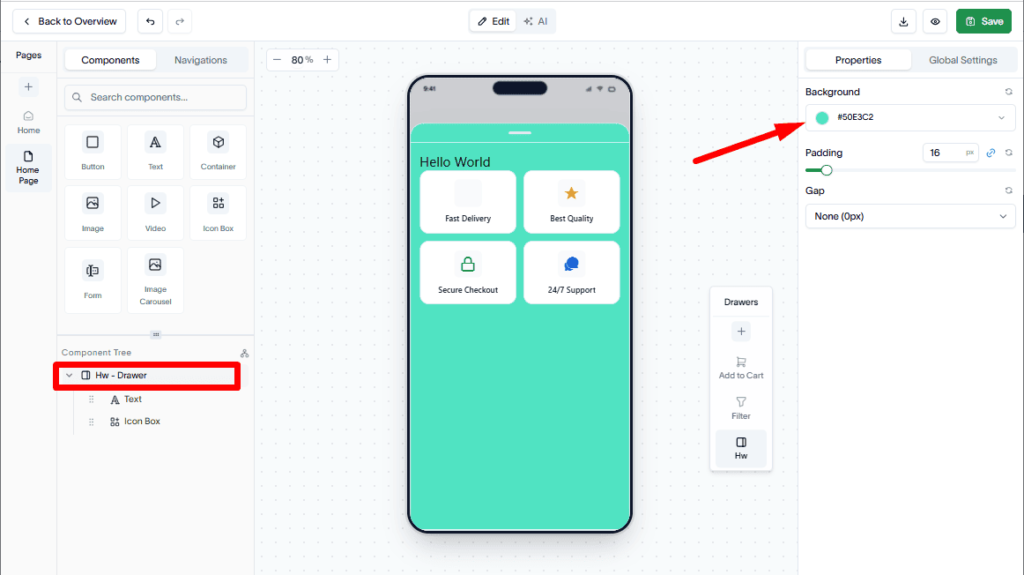
Adjust the drawer’s design settings to match your application’s branding and user experience requirements.
Open a drawer using a button
You can configure a button on a page to open a drawer when clicked.
Step 1: Add a button
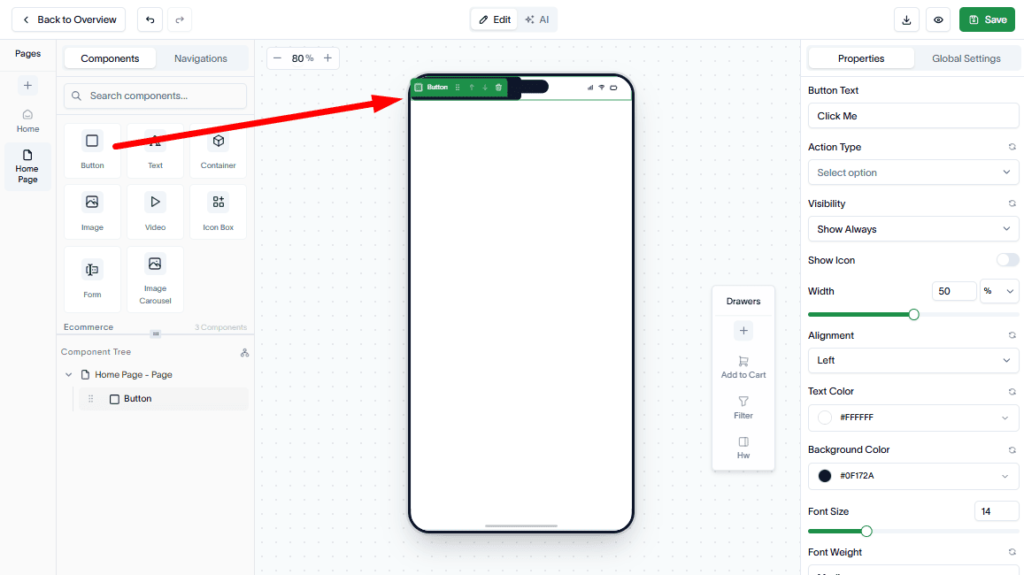
Drag and drop a Button component onto a page (outside of the drawer).
Step 2: Configure the button action
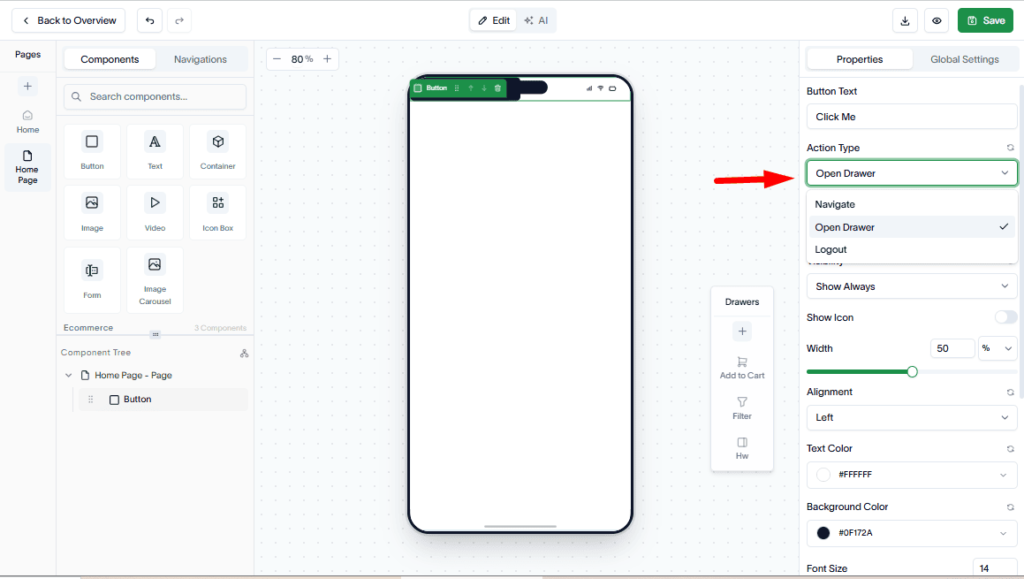
Select the button and set the Action Type to Open Drawer from the button properties.
Step 3: Select a drawer
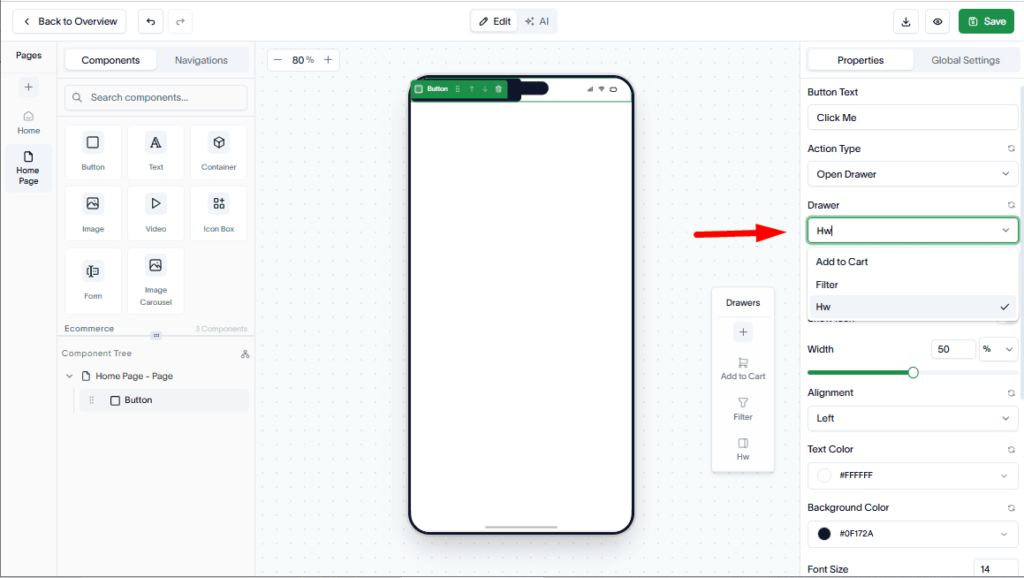
Choose the target drawer from the Drawer dropdown list.
Step 4: Save and test
Save your changes and preview the app. Clicking the button will open the selected drawer.